Navigation

  • index
  • next |
  • previous |
  • Antistasi Guide documentation »
  • Dev Guide »
  • Antistasi Porting Instructions »
  • Street Artist Generation

Logo of Antistasi Guide

Table of Contents

  • Beginners Guide for Antistasi v3.0
  • Detailed Reference Guide
  • Dev Guide
    • General
    • Development
      • Dev Tools Starter Setup
      • How to build Antistasi
      • Antistasi Porting Instructions
        • Antistasi Porting Maps
        • Antistasi Porting Mods
        • Street Artist Generation
          • Quick Start Guide
          • Generate navGridDB & open the Street Artist Editor
          • Import navGridDB & open the Street Artist Editor
          • Further Reading
        • Street Artist Editor
      • How to Extend Antistasi?
      • Technical Standards for Core Code Contributions
      • Addon Functions & Folders Library
      • Debug Console Commands for Devs
      • Translation-Localization of Antistasi via Tolgee
    • Deprecated

GitHub

Star
Follow @official-antistasi-community

Street Artist Generation

Please note that this part is still heavily work in progress. For more dev related information please go to our Antistasi-Wiki-for-Devs.

Quick Start Guide

Quick Start Guide

  1. Run Arma 3.

  2. Make an empty mp-mission on any map (community or official) with just one player.

  3. Save and close the editor.

  4. Locate the folder :code:A3-Antistasi\Tools\StreetArtist\.

  5. Copy Everything in this folder (includes: /Collections/, /functions/, /description.ext, /functions.hpp and /NG_importGUI.hpp)

  6. Paste into the folder of the mp mission you created. Usually in :code:C:\Users\User\Documents\Arma 3 - Other Profiles\YOUR_ARMA_NAME\mpmissions\MISSION_NAME.MAP\

  7. Start host LAN multiplayer.

  8. Run and join the mission.

  9. Press Esc on your keyboard to open debug console.

  10. Paste [] spawn A3A_fnc_NG_main into big large debug window.

  11. Click the button Local Exec.

  12. Exit Debug Console, look down, and open map.

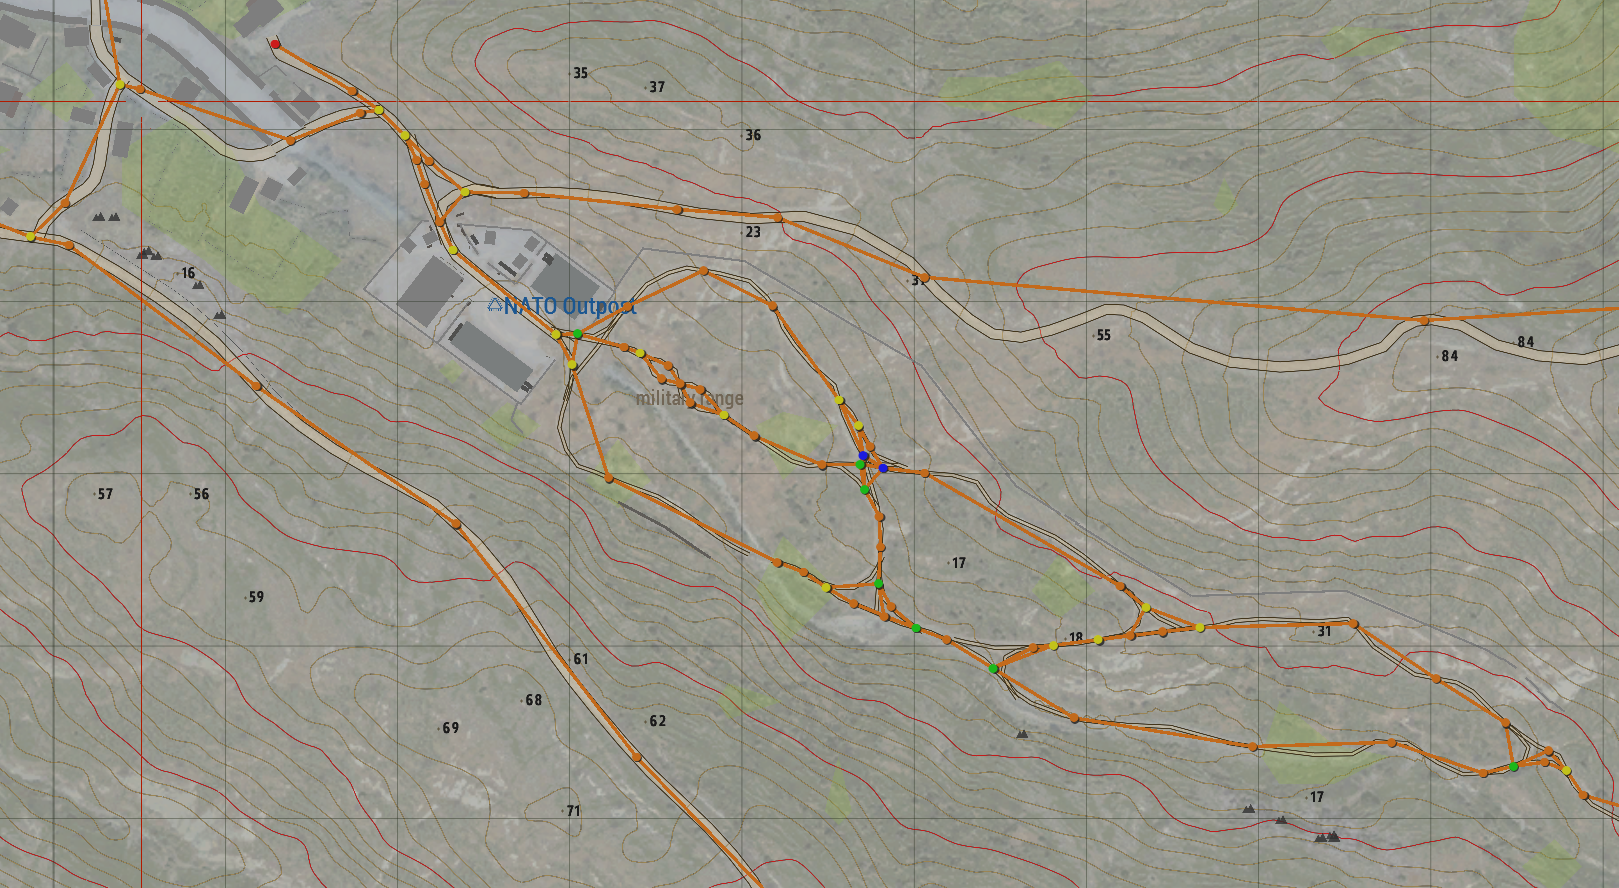
  13. Wait for it to start drawing markers.

  14. Open a new file.

  15. Paste into the new file.

  16. Save.

See Street Artist Editor for A3-Antistasi navGrid Guidelines (and GIFs!).

Generate navGridDB & open the Street Artist Editor

Generate navGridDB & open the Street Artist Editor

Executing [] spawn A3A_fnc_NG_main will run with default settings. Looking down gives the best performance during this process. You can lower render distance if it helps. However, you may need to tweak some arguments depending on the simplification level required for the map.

A3A_fnc_NG_main Arguments:

  1. Max drift is how far the simplified line segment can stray from the road in metres. (Default = 50)

  2. Junctions are only merged if within this distance from each other. (Default = 15)

  3. True to automatically start the StreetArtist Editor. (Default = true)

So running with default settings would also look like this [50,15,true] spawn A3A_fnc_NG_main;
To run with default and not edit use [nil,nil,false] spawn A3A_fnc_NG_main;
Max drift is not the only thing that affects road simplification: It will only simplify if the nearestTerrainObject from its position will still return one of it’s neighbouring roads. This prevents virtual convoys that are trying to spawn vehicles from jumping to another nearby road because that is the closest navGrid node.

Import navGridDB & open the Street Artist Editor

Import navGridDB & open the Street Artist Editor

If you have already generated a navGridDB before loading the world and you do not want to regenerate it again: you can use the import function to load it into Arma 3 for viewing or editing.

  1. Local exec [] spawn A3A_fnc_NGSA_main in the debug console.

  2. Press Continue to close debug console. (If you press Esc, you will close the import dialogue!)

  3. Switch to real-life and open the navGridDB file and Copy everything.

  4. Switch to Arma 3 and paste it into the editBox and press the the import button.

Further Reading

Further Reading

See Street Artist Editor for A3-Antistasi navGrid Guidelines (and GIFs!).
You can find further satisfying and accurate documentation on all sorts of things by looking into the headers of files in ./functions/StreetArtist/.

../../../_images/Street_Artist_generation-1.png

Navigation

  • index
  • next |
  • previous |
  • Antistasi Guide documentation »
  • Dev Guide »
  • Antistasi Porting Instructions »
  • Street Artist Generation
© Copyright 2024, Official Antistasi Community. Last updated 2024/October/14